Posts

Showing posts from 2012

Attempt at Faux Bois Log Planter 1

Image
Hardware cloth armature. First coat.  Faux bois effort. 

Vermiculite Concrete Gate 6

Image
The front of gate is pretty much complete, except for some touching up with the Dremil tool. The back will will simply be primed  and painted.

Vermiculite Concrete Gate 5

Image
Almost completed.  Knots, grain, splits, & nail holes.

Vermiculite Concrete Gate 4

Image

Vermiculite Concrete Gate 3

Image

Vermiculite Concrete Gate 2

Image
Details of faux wood effort. 

Vermiculite Concrete Gate 1

Image
Armature made from fence posts with gate corners, extruded polystyrine sheathing. metal lathe, and chicken wire. Using two parts vermiculite, one part builder's lime, one part Portland cement. Hanging plaque made with similar mixture over Styrofoam and chicken wire.

Vermiculite concrete experiment

Image
Working toward re-making the garden gate, which was an earlier attempt at faux wood using papercrete. The gate hangs on a fence post, so weight is a big consideration. That first effort was made of vermiculite, cellulose insulation, and cement. This new mix is two parts vermiculite, one part cement, and one quarter part builder’s lime. I started with one part water, but the vermiculite seemed to absorb a lot, and I had to add water was I worked. I made the armature for this small experiment out of  Styrofoam insulation and chicken wire. It will be a sort of hanging plaque, but I am more interested in seeing if the mix, sans paper, will work for the gate, and how heavy the finished product will be.  The vermiculite mix handled almost as well at that made with sand. It was coarser, but not as much as papercrete, and I could add more details than with papercrete. 

Refinishing the Papercrete Garden Wall 7

Image

Resurfacing the Papercrete Garden Wall 5 (repost)

Image
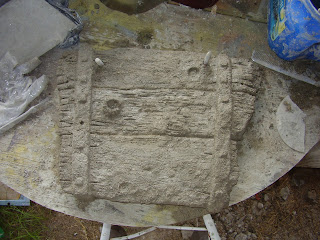
I accidentally deleted this post. I'd written that I'd run out of ready mix joint compound and substituted some powdered joint compound, and was pleased with how it handled. It also allowed me to thoroughly mix the joint compound in, which is difficult when using ready mix. When using ready mix joint compound, I add water to the sand, cement, and cellulose insulation, then add a glob of joint compound, squeezing and mixing as thoroughly as possible. Using the powder I can just add the joint compound to the dry mix and mix it in with a drill bit. I was surprised that the powder gave the mix a similar "clay-like" quality to that mixed with ready-mix. I'd made small batches that day, using a two pound coffee can, mixing one can sand, 1/2 can Portland Cement, 1/2 can cellulose insulation, and what amounted to two cups powdered joint compound, and mixed it with an electric drill with a mixer bit. This mix seems to set a bit, especially on a hot afternoon, in the b...

Resurfacing the Papercrete Garden Wall 6

Image
Continuing work on the garden wall using the sandy mix with powdered joint compound. This section is an effort at faux wood. I'm fairly pleased with it and would like to try "faux bois" textures with finer aggregates than sand and paper.  The photo below is the finished section of "faux brick showing behind broken stucco."

Resurfacing the Papercrete Garden Wall 4

Image
Continuing to rework the garden wall. This section is an attempt at faux brick.

Resurfacing the Papercrete Garden Wall 3

Image
More work on the garden wall. These days I'm mixing the ingredients dry in the cement mixer -- six parts sand, three parts paper, three parts Portland cement -- then putting a bit of the dry mix into a 5-gallon bucket and hand mixing in water and joint compound. It's a very workable mix, and cures to form a nice, hard shell.

Resurfacing the Papercrete Garden Wall 2

Image
Continuing to rework the garden wall using the same sandy mix --six parts sand, three parts cellulose insulation, three parts Portland cement, approximately two parts water, and a little joint compound.

Resurfacing the Papercrete Garden Wall #1

Image
A work in progress -- refinishing the papercrete garden wall. Papercrete, I think, for most of us, involves a  lot of experimentation and a good sized learning curve. There is information on line, but most of it is like the information in this blog – experimental recipes and processes that offer a starting place for our own endeavors. Those batches of papercrete I mixed two or three years ago for the garden wall were, like the first layers daubed onto the gazebo structure, too soft for exterior work– too much paper, not enough sand. The strongest, most workable papercrete has been the heaviest – lotsa sand, some paper, some cement, some ready-mix joint compound to help it stick. The same learning curve applies to the lime plaster applied to the garden wall a couple of years ago. Though the surface of the inside wall was still looking fair, the outside surface was brittle and full of cracks. Possible causes are plentiful. Like my practically nonexistent curing process. Or m...

Hypertufa/Papercrete Planter

Image
 The base coat on this planter is plain old hypertufa consisting of (using 2-pound coffee cans for measurement) one can of peat moss, one of Pearlite, ½ of Portland Cement, one of water (there about), and a little lime putty. I’d made the armature using two old, sun-beaten, brittle planters that were ready for the landfill fastened together with sheet metal screws and covered with two layers of poultry wire (see photos below). So far I’ve found that this type of Hypertufa mix is good for casting but is honestly difficult to daub onto wire without either ready mix joint compound or lime putty to make it stickier. Even then it doesn’t seem very workable. Perhaps more cement to the mix would make it stick to the armature better. I'll continue to research and experiment. As it was, I applied the hypertufa with some force to push it deep into the wire and keep it from falling off. For the design on front I used the same mixture as above, but substituted cellulose insulation for...