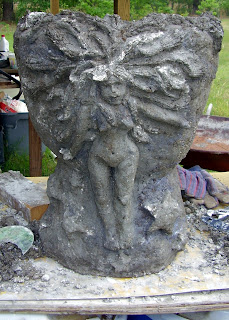
Hypertufa/Papercrete Planter
The base coat on this planter is plain old hypertufa consisting of (using 2-pound coffee cans for measurement) one can of peat moss, one of Pearlite, ½ of Portland Cement, one of water (there about), and a little lime putty. I’d made the armature using two old, sun-beaten, brittle planters that were ready for the landfill fastened together with sheet metal screws and covered with two layers of poultry wire (see photos below).
So far I’ve found that this type of Hypertufa mix is good for
casting but is honestly difficult to daub onto wire without either ready mix
joint compound or lime putty to make it stickier. Even then it doesn’t seem
very workable. Perhaps more cement to the mix would make it stick to the
armature better. I'll continue to research and experiment. As it was, I applied the hypertufa with some force to push it
deep into the wire and keep it from falling off.

 For the design on front I used the same mixture as above,
but substituted cellulose insulation for Pearlite. I guess that makes it papercrete
rather than hypertufa. Not only did that make the mix much cheaper, it made it
75% more workable. The planter had cured
overnight, so I could lay it on it’s back to work and wasn’t working on a
vertical surface. I added only enough water to make the mix damp instead of
wet, mixed in the lime putty, and kept a can of water nearby. I’d take a glob
of the damp mix, dip my (gloved) hand in the water, and play with it a bit before
applying it to the base coat. This seemed to give me a little more control over
how wet the mixture got. I also used a concrete bonding agent, both on the
surface of the basecoat and as I worked and modeled the papercrete, sometimes
dipping my fingers in the bonding agent rather than the water. Though I still
wasn’t able to get a lot of detail, I was fairly pleased with the end result
and felt it was a good start.


Really nice!
ReplyDelete