CHARCOAL KILN EXPERIMENT
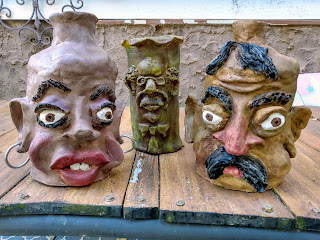
The pieces shown here were painted with exterior acrylics after firing in my charcoal kiln. I only recently started working and playing with ceramic clay, and I wanted a way to fire my experiments without access to an electric kiln. I wouldn't have known where to start without a great video on Youtube by Tony Soares, a Native American potter. My three pots were bone dry. It was chilly outside where they sat, so they were cold to the touch, I preheated them in our kitchen oven, starting at 175 degrees and working up to 500 degrees. The process took about an hour. I had the idea of building the kiln inside our fire ring for safety, but as it burned I saw it wasn't necessary and, thinking the ring might impede air flow, I eventually removed it. To build my kiln, I first placed a piece of sheet metal on the ground and made the base on top of it. I happened to have these bricks with holes in them, and thought they would enhance air flow. I placed a small metal grate on bricks. C


